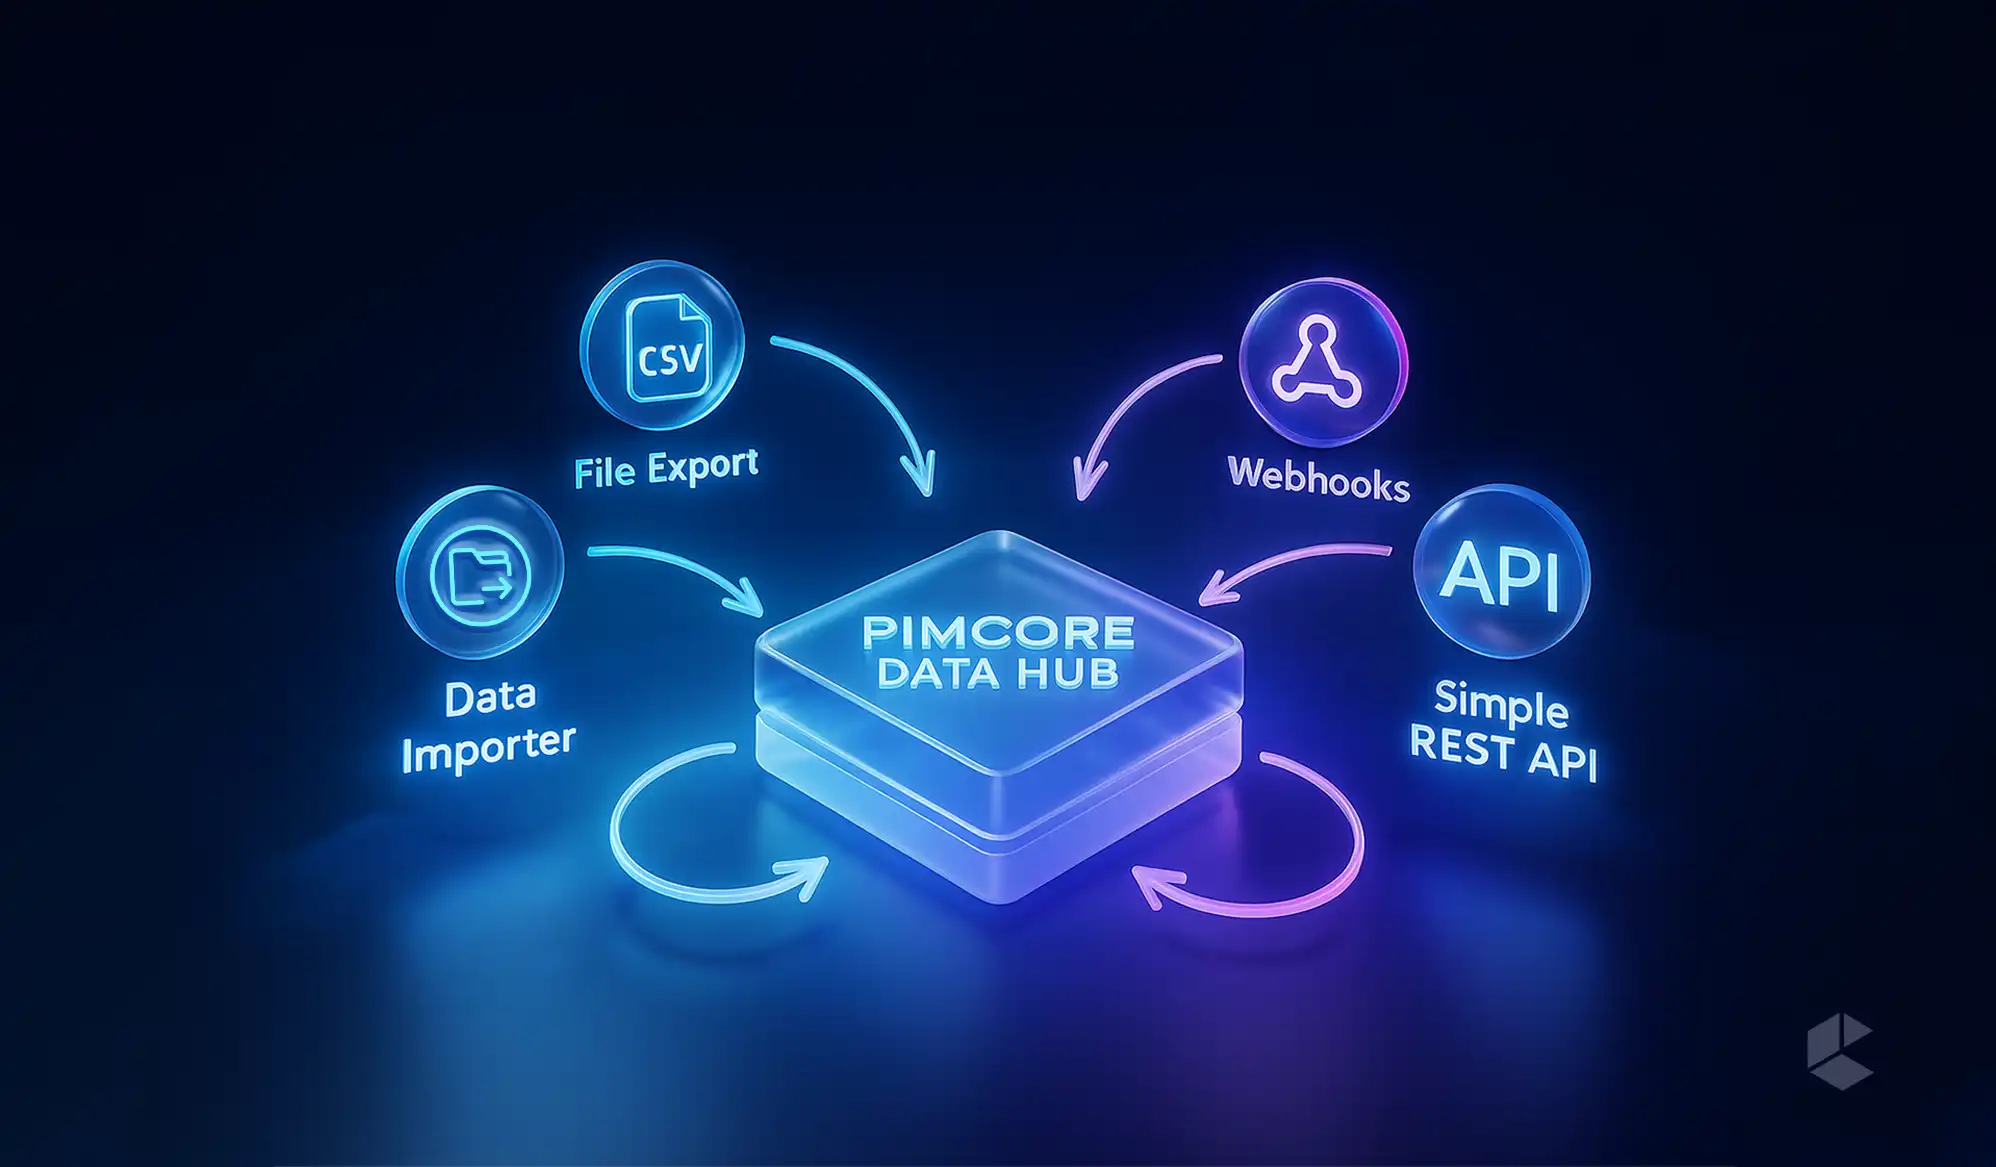
- Pimcore Data Hub enables seamless data import, export, and integration between Pimcore and external systems.
- Data Importer handles bulk, structured imports with mapping and transformation capabilities.
- File Export lets you generate and schedule CSV, JSON, or custom-structured exports.
- Simple REST API provides fast, read-only, indexed access to Pimcore data.
- Webhooks push real-time updates to external systems whenever defined events occur.
- Combining multiple Data Hub tools creates flexible, reliable, and efficient integration workflows.
Ever spent sleepless nights, trying to write custom scripts for data exchange? But even after all that effort, a lot of the time, the connection breaks with every update. Not anymore! Pimcore Data Hub is designed to centralize all data imports, exports, and synchronizations under one umbrella that makes everything easier, faster, and far more reliable!
What is Pimcore Data Hub

Pimcore Data Hub is the data delivery and consumption platform that acts as an interface layer for connecting Pimcore to other systems and applications. It provides a unified, configurable interface that makes integrating with other platforms, applications, or services far easier than rolling your own solution from scratch.
At its core, Data Hub comes with a GraphQL API. This allows you to define multiple endpoints, control what data is exposed, and work with curated schemas and workspaces. And you get all this without even touching heavy backend code! Whether you’re delivering product catalogs to a front-end, syncing media assets to a CMS, or pushing structured data to third-party tools, Data Hub makes it possible with a visual, schema-based process.
Installing Data Hub
Getting Data Hub running is a straightforward process. It involves installing the bundle, enabling it, and finalizing setup via the command line. The basic steps are:
- Add the bundle to your project using Composer.
- Enable it in your config/bundles.php file.
- Run the installation command to complete the setup.
# Install Pimcore Data Hub bundle

composer require pimcore/data-hub

# Add to bundles.php

use Pimcore\Bundle\DataHubBundle\PimcoreDataHubBundle;

return [

  …

  PimcoreDataHubBundle::class => [‘all’ => true],

];

# Finalize installation

bin/console pimcore:bundle:install PimcoreDataHubBundle
Once installed, configuration access is limited to users with admin or plugin_datahub_config permissions, so make sure the right people have the rights to manage it.
Extending Data Hub: Importer, File Export, REST, and Webhooks
Data Hub is modular in design. While its default GraphQL support is powerful, the true flexibility comes from its additional adapters. These extend its capabilities for more specific use cases:
Data Importer
This module lets you bring data into Pimcore from various external sources such as CSV, XLSX, JSON, and XML files. It supports detailed mapping configurations, transformation rules, update strategies, preview functionality, logging, and even scheduled imports via cron jobs.
File Export
Perfect for when you need to export Pimcore data as flat files. You can configure it to deliver files to local directories, SFTP servers, or even through HTTP POST requests. Built-in caching options speed up repeated exports, making it efficient for large datasets.
Simple REST API
A read-only API that’s optimized for quick access to Pimcore data. It’s backed by Elasticsearch or OpenSearch indexing for fast queries and offers endpoints like tree-items, search, and get-element. Security is handled via bearer tokens, and a built-in Swagger UI makes testing straightforward.
Webhooks
Enables Pimcore to send real-time notifications when certain events occur. These events can be triggered by changes to data objects, assets, or documents, as well as workflow actions. You can define the structure of the payload, choose whether to include unpublished data, and limit event triggers to specific workspaces.
Each of these modules provides a different way to move data. You can import structured datasets, export curated collections, query your data via REST endpoints, or react instantly to changes using event-driven hooks.
Why Use Data Hub
Managing data exchange manually often means dealing with multiple scripts, custom API integrations, and brittle connections that break with every update. Data Hub centralizes this process into one cohesive tool, providing a visual interface and modular features that can handle both one-off transfers and ongoing synchronization.
It’s flexible enough for batch data migrations, real-time feeds, and on-demand API queries, meaning you don’t have to juggle multiple integration strategies. Whether you’re working with internal tools, partner systems, or public-facing apps, Data Hub offers a consistent and maintainable way to manage those connections.
Data Importer: Bringing Data into Pimcore
The Data Importer module is designed for situations where data needs to be pulled into Pimcore from external sources and transformed into usable objects, assets, or documents. This is especially handy when dealing with third-party catalogs, supplier feeds, ERP exports, or large legacy datasets. Instead of building a one-off script, the Data Importer gives you a structured, repeatable, and maintainable process for ingesting information.
Supported Data Formats
Pimcore’s Data Importer is flexible about where your data comes from and what it looks like. You’re not locked into one format:
- CSV – Ideal for tabular data like product lists, price sheets, or user data.
- XLSX – Useful when data originates in spreadsheets with multiple sheets and formatted tables.
- JSON – Great for complex hierarchical data structures, often used in modern APIs.
- XML – Still widely used in enterprise data exchange, especially for catalog or order data.
Let’s take a look at a sample of JSON and XML datasets and how they may look before they’re imported into Pimcore.
<?xml version="1.0"?>

<root>

  <item>

    <title_de>Et voluptas culpa et incidunt laborum repellat.</title_de>

    <title_en>Aliquam et voluptas nemo at excepturi.</title_en>

    <technical_attributes>

      <attribute>

        <key>1-6</key>

        <value>Myrtle Kovacek</value>

      </attribute>

      <attribute>

        <key>2-4</key>

        <value>Ut.</value>

      </attribute>

    </technical_attributes>

  </item>

</root>

json

Copy

Edit

[

  {

    "title_de": "Voluptas et est voluptas.",

    "title_en": "Animi ipsam rem et sed vel voluptas.",

    "technical_attributes": {

      "1-6": "value 1",

      "2-4": "value 2"

    }

  }

]
Each format has specific configuration options, but the workflow for importing them is consistent.
Defining Data Sources
The first step in any import job is telling Pimcore where to get the data from. This could be:
- A file stored locally on the server.
- A file accessible via HTTP or HTTPS.
- An SFTP server location.
You can even automate retrieval from remote sources so the latest data is always available when the import runs.
Mapping Data to Pimcore Objects
This is the heart of the Data Importer. Once the data source is defined, you map incoming fields to Pimcore object fields. For example:
- A CSV column called product_name might map to a Pimcore field name.
- A JSON key like pricing.regular might map to a numeric field price.
The mapping interface also allows for transformations. You can:
- Concatenate multiple source fields into one.
- Apply conditional logic (e.g., if stock is 0, set availability to “Out of Stock”).
- Convert formats (e.g., date strings to Pimcore Date objects).
This means you can adapt incoming data even if it doesn’t perfectly match your internal schema.
Update Strategies
Not all imports are simple “add everything from scratch” operations. The Data Importer lets you define update strategies for handling records that already exist:
- Create Only – Only new records are added; existing ones are left untouched.
- Update Only – Only updates existing records; ignores new entries.
- Create and Update – Adds new entries and updates existing ones.
- Delete Missing – Removes Pimcore objects that aren’t present in the incoming dataset.
Choosing the right strategy is crucial for maintaining data integrity.
Scheduling Imports
For recurring data syncs, you can schedule imports via Pimcore’s built-in cron system. This is perfect for scenarios like:
- Updating prices daily from a supplier feed.
- Refreshing stock levels every hour.
- Syncing product descriptions weekly from an ERP.
You can run imports manually for one-off jobs or set them to execute automatically at defined intervals.
Preview and Testing
Before running a full import, the preview feature allows you to test the mapping and transformation rules. This step helps you catch issues early, such as mismatched fields, incorrect data types, or formatting problems.
Logging and Error Handling
Every import run generates a detailed log. This includes:
- Number of records processed.
- Number of new, updated, or deleted objects.
- Any errors or warnings.
Logs are invaluable for troubleshooting and provide transparency for auditing purposes.
Real-World Use Cases
Some common scenarios where the Data Importer shines include:
- Merging supplier catalogs into a unified product database.
- Migrating legacy data during a system upgrade.
- Importing bulk media asset metadata from an external DAM.
- Regularly syncing content between Pimcore and external systems.
By leveraging its mapping, transformation, and scheduling features, the Data Importer becomes a central part of keeping your Pimcore data fresh and accurate.
File Export: Sending Data Out from Pimcore
While the Data Importer focuses on bringing information in, the File Export module is all about delivering curated datasets from Pimcore to external systems. Whether you’re generating partner feeds, sending product data to a marketplace, or producing reports for internal teams, File Export provides a structured and repeatable way to get it done.
Supported Export Formats
The module can generate outputs in widely used formats, making it easy for other systems to consume your data:
- CSV – Ideal for flat, tabular datasets like order reports or price lists.
- JSON – Flexible and well-suited for APIs or applications that expect hierarchical data.
- XML – Still the format of choice for many enterprise integrations, especially in retail and manufacturing.
These options allow you to align your exports with whatever your partner systems or processes require.
Defining the Data to Export
The first step in configuring an export is deciding what information will be included. You can:
- Select specific object classes (e.g., products, customers, assets).
- Apply filters to export only relevant items (e.g., products in stock, customers in a certain region).
- Define which fields will be included in the output and in what order.
This targeted approach ensures that only the necessary data is exported, which can significantly reduce processing time and file size.
Transformation and Formatting
Much like the Data Importer, the File Export module allows for transformation rules during the export process. For example:
- Convert prices into a specific currency before output.
- Format dates into a required standard.
- Merge or split fields to match the target system’s expectations.
This flexibility helps maintain compatibility even when external systems have strict format requirements.
Export Destinations
Once you’ve defined the content, the next step is deciding where the files will go. The module supports multiple delivery methods:
- Local directory – Save the file directly to the Pimcore server.
- SFTP – Push the file securely to an external server.
- HTTP POST – Send the file as part of an HTTP request to an endpoint.
These options allow for both automated workflows and manual retrieval, depending on the integration scenario.
Caching for Performance
For large datasets or frequent exports, File Export includes caching capabilities. This means that if the same dataset is requested repeatedly, the system can serve it from cache instead of regenerating it each time. This greatly improves performance and reduces server load.
Scheduling Exports
Exports can be run on demand or scheduled to occur at specific intervals. Common examples include:
- Daily price and stock updates to marketplaces.
- Weekly customer segment reports for marketing.
- Monthly compliance reports in XML format for regulatory bodies.
You have the option to manually run file exports or you can even schedule them via cron:
# CLI export (manual)

bin/console datahub:export:file

# Cron-based export

# Schedule this in your crontab:

* * * * * bin/console datahub:export:file:execute-cron
Error Handling and Logging
Each export run generates logs showing:
- The number of records exported.
- Any skipped or failed entries.
- Delivery status for remote destinations.
Logs make it easy to troubleshoot issues such as connection failures to an SFTP server or data mismatches that prevent certain records from being included.
Real-World Use Cases
File Export is commonly used for:
- Sending eCommerce product feeds to platforms like Google Shopping or Amazon.
- Delivering inventory lists to logistics partners.
- Sharing order details with fulfillment centers.
- Providing internal business teams with regularly updated reports.
When configured well, it can turn Pimcore into a central hub that not only stores data but actively distributes it where it’s needed, in the exact format required.
Simple REST API: Quick, Read-Only Access to Pimcore Data
The Simple REST API in Pimcore Data Hub is designed for scenarios where external systems need fast, read-only access to data without the overhead of complex GraphQL queries. It’s streamlined, index-driven, and optimized for speed, making it a great choice for lightweight integrations and public-facing endpoints.
Purpose and Advantages
The Simple REST API exists alongside Pimcore’s GraphQL API but is purpose-built for high-performance querying. By leveraging an index from Elasticsearch or OpenSearch, it allows rapid retrieval of objects without stressing the Pimcore database. This is especially valuable for search-heavy operations or when exposing data to high-traffic services.
Key benefits include:
- Faster query response times due to index-based lookups.
- Simpler structure compared to GraphQL for quick consumption.
- Minimal configuration once indexing is set up.
Indexing with Elasticsearch or OpenSearch
For the API to function, data must be indexed in Elasticsearch or OpenSearch. This means creating a searchable representation of your Pimcore objects in Elasticsearch or OpenSearch. The index determines what fields are searchable and retrievable.
The indexing process can be tailored to specific object classes and fields, allowing you to exclude unnecessary data and keep the index lean for faster performance.
Available Endpoints
The Simple REST API comes with a small set of focused endpoints:
- tree-items – Retrieves a hierarchical structure of items, ideal for navigation menus or category trees.
- search – Executes search queries against the indexed data, returning matching objects.
- get-element – Fetches detailed information about a single object by its ID.
Let’s take a quick look at a few sample requests for the Simple REST API.
GET /datahub/simple-rest/tree-items

Authorization: Bearer <TOKEN>

GET /datahub/simple-rest/search?query=...

Authorization: Bearer <TOKEN>

GET /datahub/simple-rest/get-element?type=object&id=123

Authorization: Bearer <TOKEN>
Response Format
All responses are in JSON, making them easy to handle in modern applications. The structure is clean and predictable, which helps reduce parsing complexity for client systems.
Security and Access Control
The Simple REST API is secured via bearer tokens. This means:
- Only authenticated requests with a valid token can access the data.
- Tokens can be scoped to specific endpoints or data sets to limit exposure.
This is particularly important when the API is exposed over the public internet, as it ensures that only authorized systems can pull data.
Testing with Swagger UI
The module provides a built-in Swagger UI interface for testing and documentation. Developers can:
- Browse available endpoints.
- See required parameters and possible responses.
- Test live requests directly in the browser.
This makes onboarding new developers or integration partners much easier.
Typical Use Cases
The Simple REST API is often used when:
- A lightweight mobile app needs quick access to product or category data.
- A partner system requires periodic searches of your catalog.
- You need to power a simple external search interface without exposing the full GraphQL API.
Because it’s read-only and index-based, it’s not suitable for write operations but is ideal for scenarios where speed and simplicity are key.
Webhooks: Real-Time Event-Driven Data Delivery
While the Data Importer and File Export handle batch data exchange, and APIs allow on-demand queries, Webhooks bring a whole new dimension, pushing data instantly when something happens in Pimcore.
A webhook is essentially a user-defined HTTP callback. When a specified event occurs in Pimcore, like a product being updated or a new asset being added, Pimcore sends a payload to a configured URL. This lets other systems react in real time without waiting for scheduled syncs or polling APIs.
Why Use Webhooks
Webhooks are ideal when you need instant updates across systems. Examples include:
- Updating a third-party search index the moment product data changes.
- Sending notifications to a marketing platform when new customer data is created.
- Triggering automated workflows in other applications as soon as an asset is uploaded.
They cut down on redundant data fetching, reduce integration lag, and allow event-driven automation.
Configuring Webhooks in Pimcore Data Hub
Setting up a webhook involves a few key steps:
- Define the Endpoint URL – The destination that will receive the payload. This could be a partner system, internal application, or an integration service like Zapier.
- Choose Event Types – Select what triggers the webhook. Options include creation, updates, deletion of data objects, assets, or documents. Workflow-related events can also be used.
- Set the Workspace Scope – Limit events to specific folders, object classes, or document types so you’re not sending unnecessary data.
- Decide on Data Inclusion – Choose whether to include unpublished data or binary content in the payload.
The following is a basic YAML configuration for a webhook that triggers on object creation and updates:
events:

  - object.created

  - object.updated

workspaces:

  - products

include_unpublished: false

include_binary: true

endpoint: https://example.com/webhook-receiver

secret: "your-secret-token"
Payload Structure and Customization
Webhook payloads are sent as JSON by default. They include details like:
- The type of event (e.g., object.updated, asset.deleted).
- The affected item’s ID and type.
- Metadata about the change.
- Optional full data object information if configured.
You can customize payloads to ensure receiving systems get exactly what they need — no more, no less.
Security Considerations
Since webhooks send data to external URLs, security is a top priority:
- Use HTTPS to encrypt transmissions.
- Implement authentication tokens or secret keys so the receiving system can verify the request came from Pimcore.
- Restrict the receiving endpoint to only accept requests from known Pimcore IPs, where possible.
These steps prevent unauthorized systems from spoofing webhook requests.
Reliability and Error Handling
Pimcore’s webhook system can be configured to handle delivery issues:
- Failed deliveries can be logged for later troubleshooting.
- Depending on the setup, retries can be implemented to avoid losing important updates.
This ensures your integrations remain consistent even if the receiving system experiences downtime.
Real-World Use Cases
Some practical examples of webhook usage include:
- Ecommerce – Syncing product updates to external marketplaces instantly.
- Marketing Automation – Pushing customer signups directly into email campaign tools.
- Content Publishing – Triggering a cache purge on a CDN whenever a web page is updated.
- Analytics – Sending event data to tracking platforms for real-time dashboards.
By leveraging webhooks, Pimcore becomes more than a static data repository — it turns into an active participant in your broader digital ecosystem.
Best Practices for Importing and Exporting Data with Pimcore Data Hub
By now, we’ve covered Data Importer, File Export, Simple REST API, and Webhooks, but using these tools efficiently requires a strategic approach. Here’s how to get the most out of them.
Plan Your Data Model Before You Integrate
One of the biggest time-sinks in integration projects is changing the data model midstream. Before setting up imports, exports, or APIs:
- Clearly define object classes, attributes, and relations in Pimcore.
- Standardize naming conventions so both Pimcore and external systems “speak” the same language.
- Avoid unnecessary complexity — a simpler model is easier to maintain and integrate.
Use Dedicated Workspaces for Imports and Exports
Keep imported or exported data in dedicated folders or classes, especially during testing. This prevents unwanted overwrites of production data and makes troubleshooting much easier.
Validate Data Before and After Transfer
The Data Importer offers mapping and transformation options; use them to ensure incoming data meets Pimcore’s requirements. Similarly, after exporting, run validation checks to confirm that the data matches the target system’s format.
Optimize Performance for Large Data Sets
For high-volume imports and exports:
- Use batch processing in the Data Importer to avoid memory overload.
- Schedule heavy tasks during off-peak hours to prevent slowing down the main system.
- For REST or GraphQL queries, limit the fields returned to only what’s needed.
Combine Tools for Maximum Efficiency
A common mistake is to rely on just one method of data exchange. You can often get better results by combining them:
- Imports via the Data Importer for bulk updates, plus Webhooks for real-time syncing of small changes.
- File Exports for periodic offline backups, plus Simple REST API for on-demand lookups.
Security Recommendations
Restrict Access to Only What’s Needed
When creating API keys, bearer tokens, or webhook endpoints, apply the principle of least privilege. Give each integration only the permissions it requires.
Keep Credentials Secure
Store access tokens and webhook secrets in a secure location, not in public code repositories or shared documents. Rotate credentials periodically to minimize risk.
Encrypt Data in Transit
Always use HTTPS for imports, exports, and API requests. For file exports, consider additional encryption before sending files to external destinations.
Monitoring and Troubleshooting
Even the best-configured integrations can run into issues. Here’s how to stay ahead:
- Enable Logging – Keep detailed logs of imports, exports, and API calls to quickly identify problems.
- Set Alerts – Monitor for failed webhook deliveries or API errors, and alert the right team members when something goes wrong.
- Use Test Environments – Always test changes in a staging environment before pushing them to production.
Conclusion
To summarize it, Pimcore Data Hub is an integration powerhouse. Whether you’re dealing with massive product catalogs, synchronizing customer data in real time, or exposing information to third-party applications, the combination of Data Importer, File Export, Simple REST API, and Webhooks gives you the flexibility and control you’ve always dreamt of!
FAQs
Pimcore Data Hub allows a straightforward approach to import, export, or share data between Pimcore and external systems using several tools (Data Importer, File Export, REST API, and Webhooks).
The Data Importer supports common formats like CSV, JSON, and XML. Advanced configurations allow mapping and transforming data before importing into Pimcore’s structured object classes.
File Export generates datasets from Pimcore in chosen formats, with customizable mappings and schedules, allowing automated data sharing or offline backups for partner systems or analysis.
Yes, webhooks can use https, authentication tokens and IP whitelists. Each of these makes sure that you will only send data out to secure endpoints, protecting you against spoofing and rogue access.
The ability to combine multiple tools, such as bulk imports with webhooks, grants you flexibility in performing very large data updates quickly and helps you with real-time sync when it comes to smaller changes, leading to a huge improvement in overall performance.


